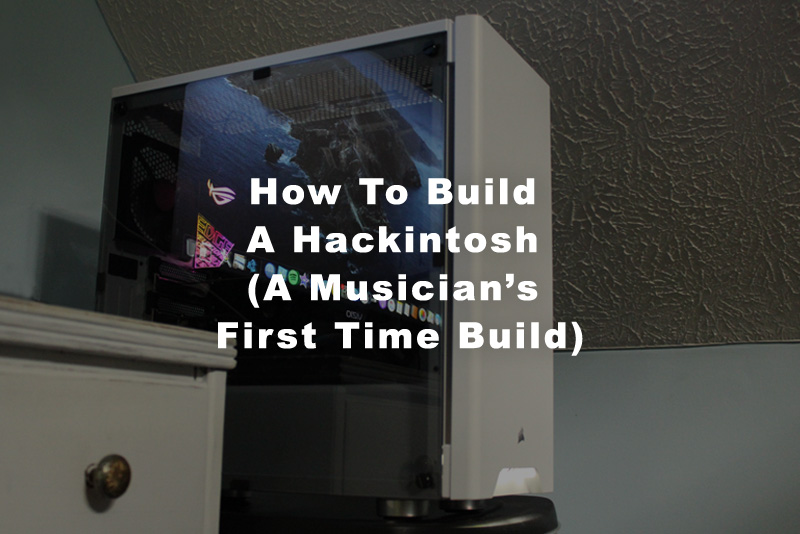
How To Build A Hackintosh (A Musician’s First Time Build)
The process for building a studio is incredibly expensive. You will need at the very least: A computer, an interface, mics, instruments, cables, and a way to listen to what you’ve recorded. Getting a professional rig together usually takes thousands of dollars and years of building, and can be easily hamstrung if your gear breaks, or becomes obsolete.
This is why many recording musicians are increasingly interested in hackintoshes. In this post, I’ll dig into the problems with current Mac computers, what a hackintosh is, the benefits of hackintoshes, and my experience building my first one.
My Pre Hackintosh Experience
I’ve used a 2012 MacBook Pro for recording for the past 5 years and was able to upgrade the RAM to 16GB’s a few years ago increasing its speed and life dramatically. I could do the same thing with the hard drive if I saw the need to.
But at a certain point, Apple’s operating systems (OS) begin to become obsolete, and their new operating systems stop working on their older machines. So, at some point, even if you fully upgrade your old Mac, you will run into problems with newer software, and need to buy a newer machine.
So Why not just go out and buy the latest Mac and call it a day? Here’s why I decided against it…
1) For most of Apple’s history, their computers were upgradeable. If your computer was getting slow and you wanted to make it faster without buying a new computer you could replace the hard drive, or upgrade the ram yourself for under $300. This all changed in 2015. Apple now solders most of their components together so that buyers can’t upgrade their computers.
2) Apple keeps changing the kinds of ports and decreasing the number of ports on their computers – a nightmare for a musician that has invested in expensive interfaces and needs more than two ports.
Even if you can get your computer to work for you for now, they are incredibly expensive and Apple has found a way to force buyers to upgrade every five years or so. Here’s a rant from well known producer and educator Rick Beato on these glaring problems:
So why not go buy a PC?
While PC’s can work with some DAW’s, I’ve been using Logic Pro, which only works on a Mac operating system. If I switched to a PC, I’d have to buy and learn a new DAW, and wouldn’t be able to open any of my existing Logic projects on my computer. Logic isn’t the only exclusively Mac app, Final Cut Pro and iMovie, some of the go-to video editing software, only work on Apple computers.
In addition, Apple has managed to reel us in with their slick design, handy features, and lack of automatic updates (…Windows *cough cough*).
The Solution
This is why so many musicians, myself included, have delved into building hackintoshes. So, what is a hackintosh? A hackintosh is a PC that runs Mac’s operating system. Here are the benefits:
1) More bang for your buck
Mac’s sleek design and special apps have enabled them to crank up prices on their computers. The result is that Mac’s are pretty much always going to cost more than a PC of comparable computing power. When you build a hackintosh, it will pretty much always be thousands of dollars cheaper than the comparable out of the box Mac option.
2) Whatever ports you want (kind of)
All modern PC Desktop motherboards allow you to add PCIE cards of your choice to increase functionality. These “cards” could be thunderbolt ports, Firewire ports, or even things like high speed wifi, you name it. While you can run into problems with certain ports not working with certain operating systems, this makes your computer incredibly customizable.
3) No more worries about going obsolete
PC’s are made to enable easy part replacement. The most expensive part in a music production hackintosh is probably going to be around $500-$600, and most of the parts are going to be around $50-250. So if something stops working, or you need a newer more powerful component, you can easily replace it without having to buy a completely new computer.
Building My First Hackintosh
I had been toying with the idea of building a hackintosh for about a year and a half, but was apprehensive about pulling the trigger. I came across Rick Beato’s video on building his hackintosh with a knowledgeable computer builder, and I was apprehensive about jumping into the build on my own:
I came across another established musician and first time hackintosher, Jacob Arnold, who posted about his process of building a hackintosh by himself on his Instagram (@thejacobarnold – you can still see the process in his highlight).
When my 2012 MacBook Pro crashed on me about a month ago, it ended up being a cheap/simple problem, but it was the scare I needed to dive into the world of hackintoshing. I had absolutely no experience or knowledge about computer building before I started.
A friend of mine recommended tonymac86x.com as a good place to start. The site has buyer guides, software downloads, and forums for troubleshooting. Here’s the TonyMacx86 approved hardware that ended up in my computer:
- Asus Rog Strix Z390-E Gaming (Motherboard)
- Intel Core I9-9900K (CPU)
- Thermaltake Slim X3 Low Profile (CPU Cooler)
- Crucial Ballistix Sport LT (32GB) (RAM)
- Samsung 860 EVO 1 TB (Solid State Drive)
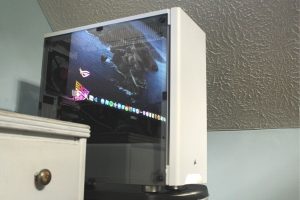
- Corsair Carbide 300R (Case)
- MSI Gaming GeForce GT 710 2GB (Graphics Card)
- Corsair RM 750x Watt (Powersupply)
Which cost me a total of: $1466.21
I also needed:
- A monitor
- A keyboard
- A mouse
- A webcam
- A firewire PCIE card
- A USB drive
Which cost me a total of: $292.73
Making a grand total of: $1758.94
I went with pretty new/cutting edge hardware, because I knew that I wanted to run the newest version of Mac’s OS. The build went relatively smoothly.
Hackintosh Build Steps
1) Make sure you have the right equipment for the build
You will need a functioning Mac in order to download a copy of the Mac OS. You will also need a 16 GB flash drive (these are about $5 on Amazon), and a small screwdriver to assemble your hardware.
2) Buy recommended hardware
Do your research to make sure that you are buying hardware that other people have used in hackintoshes before. There is hardware that can’t work with Mac’s OS. Tonymacx86.com is a great resource for finding the right hardware for you. They have recommended gear lists that are proven to work.
3) Put your hardware together
There are plenty of video guides out there of people putting together a Desktop PC. I used this one.
4) Create your bootloader
There are two ways of getting Mac OS to boot on a PC: Clover and OpenCore. I ended up going with OpenCore because I found an in depth video walkthrough of an OpenCore install with my exact motherboard and CPU.
Clover has been around longer and has more support, but the word on the street is that it is becoming obsolete with newer Mac updates. OpenCore is the new kid on the block: it’s still technically in beta, and there’s not as much info out there on using it, but experts are saying its the future, and will be more dependable going forward.
Here’s a guide on creating a Clover Bootloader
4) Don’t be afraid to ask for help
Building a hackintosh isn’t as complex as you might think. But, it’s easy to get confused when you’re doing something for the first time. If things start to not go as planned and you start to lose steam, there are lots of knowledgeable builders out there on tonymacx86.com, the hackintosh reddit, and hackintosher.com. When I ran into problems, I found expert hackintosh builder and youtuber Technolli, who is available for paid technical support to help builders get up and running. It costs $49 to video chat with Technolli for as long as it takes to get you up and running. Technolli was able to help me identify a piece of gear that wasn’t working that I was able to replace and get my hackintosh up and running.
Here are some of the problems that I ran into:
1) In order install Mac OS on your hackintosh you need to load it onto a flashdrive using a functioning Mac. I had problems using my 2012 MacBook Pro computer, and had to use someone else’s iMac to create my flash drive. If I hadn’t been able to find another Mac, I wouldn’t have been able to build my hackintosh. It might be worth ordering a 16gb flash drive and seeing if you are able to upload your desired Mac OS to it before ordering all the hardware for your build.
2) I originally ordered a Radeon RX 580 8 GB graphics card. After struggling to get my computer to download and boot Mac OS for days, I reached out to Technolli to see if he could help me get up and running. He helped me find that my graphics card wasn’t functioning and was causing my computer not to boot correctly. I promptly returned it (for free through Amazon). I realized that I didn’t need a graphics card quite that powerful for music production, and so I was able to save about $130 with an MSI graphics card. Once I installed that graphics card, things worked perfectly.
The End Product
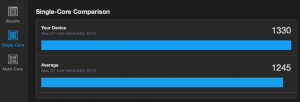
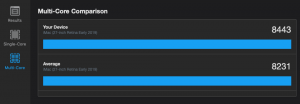
Once I had my computer up and running, I used a program called GeekBench to test it’s processing power. GeekBench also shows you the scores of other Macs so that you can see how yours compares. Here’s the results:
The top score is my computer, and the bottom score is the most powerful 2019 iMacs. As you can see, my hackintosh scored better on it’s single and multicore scores. My computer cost about $1,800 total. A comparable iMac is about $5,000 – almost three times the price.
Would I recommend building a hackintosh?
Yes… If you have the time and resources. In the end, it took me about a full two weeks of work to get my hackintosh up and running – that includes research, build, and Mac OS install. I sunk a lot of time into trying to get my computer to boot Mac OS when I had an underlying hardware issue. My guess is I could have cut out a full 4-5 days of troubleshooting if I hadn’t had this problem. I also had a reliable Mac to download a bootable version of Mac’s OS. If you have a reliable Mac to work on, the time to work on it, and a DIY mindset, you should be fine. As I said at the beginning of this article, I had never built a computer before. There is tons of info out there to help you finish.
Here’s a complete walkthrough from Technolli on how to get a music production hackintosh up and running.


